84 Inch Round Dining Table
Assembly Instructions
For questions or concerns about the install please call Donald @
201-936-4340
1) Locate ALL hardware first and separate long and short screws.
You should have the following hardware
1) 16 short screws (1")
2) 16 long screws (1.5") (Some of thewse screws may already be assembled into pedestal)
3) Cabinet clamps
4) Pedestal
5) One large board with no big holes (Scab)
6) One large board with 4 big holes (Pedestal Top) This may already be attached to pedestal.
2) Lay down CLEAN blankets in dining area. The table will lay face down on these pads so make sure they are super clean. Make sure the combined blankets make at least a 8 foot square and make sure the pads are clean, flat and level. It must be level or next step will not work properly and can cause harm to the table and hardware.
3) Lay down the two table halves upside down with finish face down on clean blankets and let the two halves come together. Be sure the blanket is not stuck in between the two halves.
4) Install cabinet clamps and cinch the two halves together with wrench provided. DO NOT OVER TIGHTEN these clamps. Just tighten hand snug and make sure the table seam is closed and not catching the blankets as you tighten the two halves together. Overtightening these clamps can crack the lacquer finish. Tighten the clamps evenly, in a round robin fashion until they are all evenly snug. Sometimes it helps to put a small piece of styrofaom under the table near the seam to hyperextend the table and get a tighter fit.
5) Take the square wood panel (Scab), WITH NO BIG HOLES and place it on the underside of the table with counter sunk pilot holes facing upwards. Align wood panel to black highlighted area. With significant pressure on this board from a kneeling position, rest your knee in the vacinity of each SMALL scew as it is assembled into the table top. We strongly suggest tightening these screws with a standard phillip head screwdriver by hand unless you have a trained hand for power tools.. Cordless screw drivers tends to overshoot the counter sunk holes and risk blowing out the table top.
See below pictures.
 Before Pressure
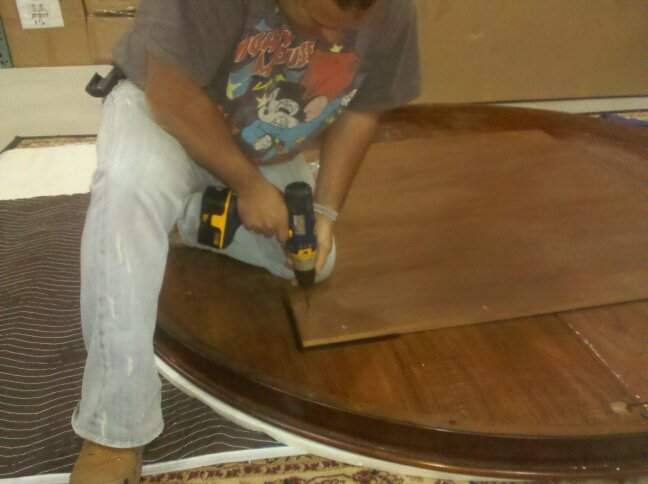
Proper Pressure
It is very important that the scab is snug to the bottom of the table while screwing in hardware. If not firmly assembled, table top will float and become uneven. Attach the scab to the table bottom with the SMALL screws.
6) This step might already be done in some circumstances. Place wood panel with big holes drilled out (Pedestal Top) on top of pedestal and screw board down onto pedestal columns and dowels. Fasten together with provided LONG screws.
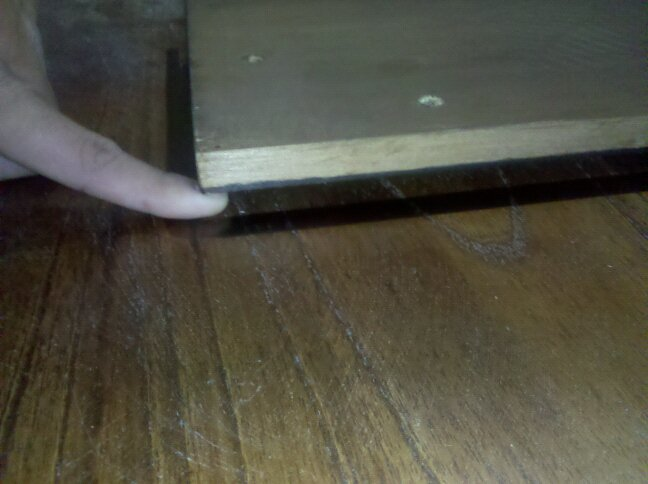
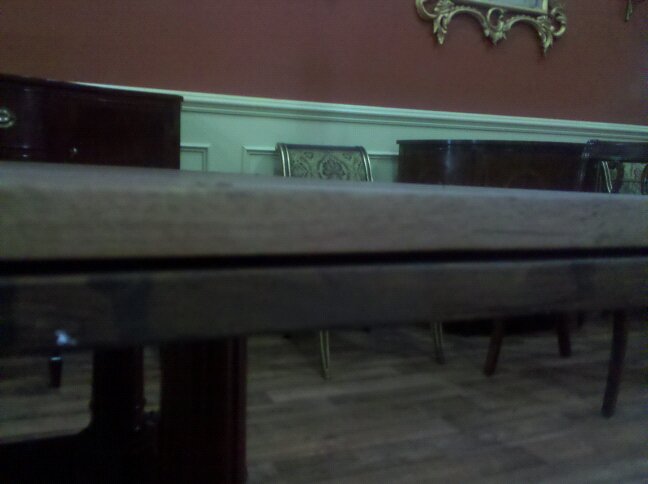
7) With two or three people and at least one person at each SEAM, lift the assembled table and lay it on top of assembled PEDESTAL TOP face up. Line up the SCAB and the PEDESTAL TOP evenly. Use LARGE screws to fasten the two boards together. To eliminate gaps or uneven seams, one person should apply pressure on top of the table while another person firmly pushes the pedestal board upwards while screwing these components together. The SCAB and the PEDESTAL TOP should be flush with no gap visible. See below pictures. If these two components are not assembled perfectly flush to each other, the table will be uneven.
This picture shows a gap between the PEDESTAL TOP and SCAB, there should be no gaps like this after proper install
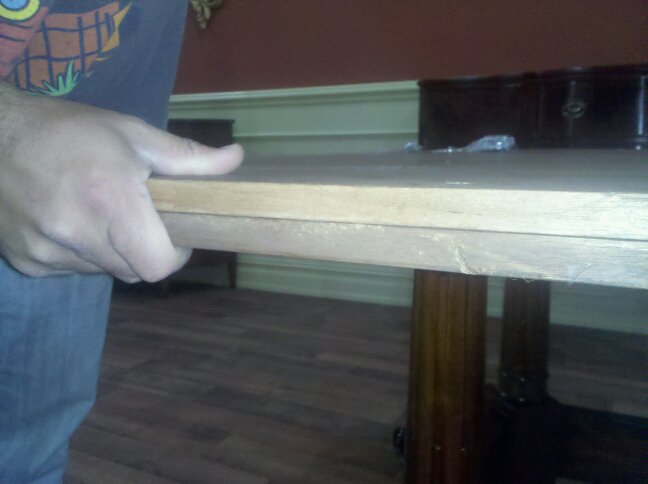
Properly fitted components should be flush, as show in this picture
8) Order some good take out, and enjoy your new table!
For questions or concerns about the install please call Donald 201-936-4340